

A Simple & Sentimental Project
- Dianna

- Jan 20, 2022
- 4 min read
Updated: Jan 21, 2022
Are you the family memory keeper?
How do you balance out documenting family events with your own creative process? Do you take tons of photos to capture everyday happenings? What do we intend to do WITH all those pictures that are so easy to accumulate these days?
Maybe you were a scrapbooker once upon a time? I sure miss the days of going away to weekend crops with my girlfriends and staying up late swapping stories about our kids' shenanigans! Admittedly, I am woefully behind on the scrapbooks I started back then and haven't been sure how to fill in the gaps or even if I want to.
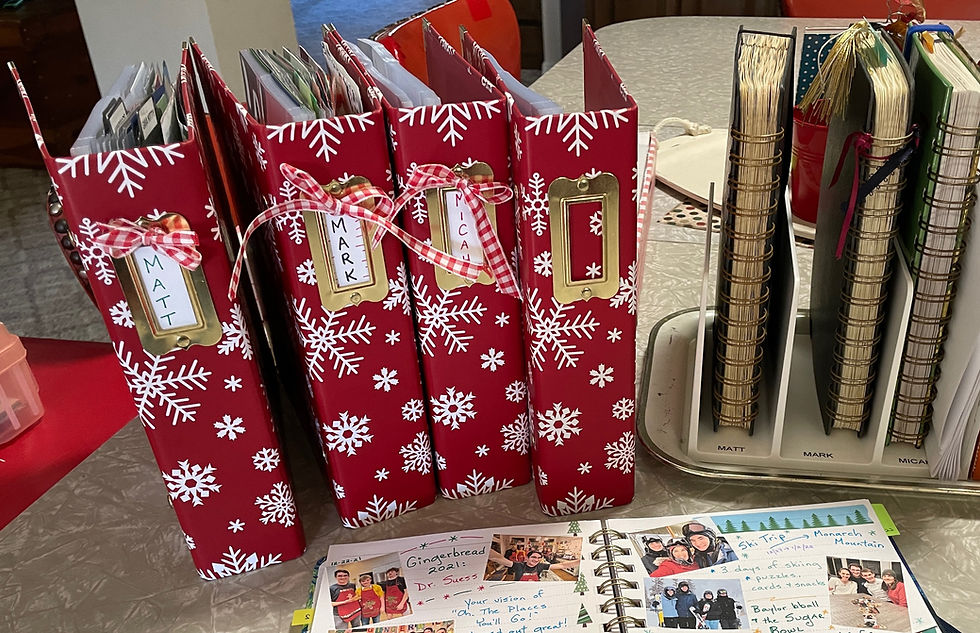
As we took down the Christmas tree, we divided our keepsake ornaments into 4 sections (one for each boy and a pile for general family ornaments). My plan is to make album for each of our 3 boys and then one for our family collection of ornaments (trip souvenirs, photo frames, gifts, special events, etc.)
Recently I saw a post about a Christmas Ornament Album and something clicked for me. I thought I'd give it a try.
I found some adorable Snowflake albums in a 6 x8 size, which seemed manageable. I explored a little more about pocket pages and decided this option would be a great way to document a bunch of single object photos.
As we took down the Christmas tree, we divided our keepsake ornaments into 4 sections (each boy and one pile for general family ornaments). My plan is to do an album for each of our 3 boys and one for our family collection (trip souvenirs, photo frames, gifts, special events, etc.) With one of our sons engaged, it made this project a bit more motivating to get his ornaments organized and labeled.

Then it was time for pictures!

I wrangled some help to do a photo session of each collection. I pulled out 3 solid tablecloths to use as the backdrop for the ornaments. I wanted to use some Christmas colors but not complicate the process with too much pattern.
I alternated the background cloth based on the color of each ornament.
After muddling through the photo printing process a while, I finally devised a strategy to batch each step to streamline the process. I printed 2 small photos on 4 x 6 photo paper.

Fortunately, I've kept a running list of the boys' ornaments which was super helpful to identify the origin and recipient of each ornament - plus the year it was received.

I attached a memorabilia pocket on the inside cover of the album to hold the ornament inventory list.
I want to keep the list accessible to continue to update it from year to year. I might get around to typing it up someday...or they may just stay roughly jotted down. We'll see!
If you don't have a memorabilia pocket, you could use a full size 6 x 8 page protector to hold your list.
I used a paper cutter to trim around the perimeter of each photo, then divided them into their collections. (grandma, handmade, and family)


In my hunt for albums, I discovered some dividers for 12 x 12 scrapbook albums. I trimmed some of these down and added labels on them for my 3 categories.

Then I was ready to start pairing my photos with pocket cards. Although the pocket cards are super handy, you can also just trim your own card stock into 3 x 4 rectangles. I did a mixture of both.
Play around with the color palettes to see what you like best.

Next, grab your favorite adhesive and glue your photos onto the pocket cards.


I chose to keep my pocket cards pretty basic without any extra embellishments. I used a regular label maker to print out the titles. On some cards I just printed out the year, but on others I added more details such as the trip we were on when we got them as souvenirs or who gifted the ornaments to us.
If you have stories to tell about particularly special ornaments, you can journal on other pocket cards and slide in beside the featured ornament. The beauty of this system is that you can always add more to the project on the next go-round: photos one year, story journaling the next year.

I slipped the completed pocket inserts into the 3 x 4 sleeves in chronological order. Voila!
Then I used my label maker again to make a title for the album spine...once I figured out how to print the letters stacked horizontally! 😜 Lastly, I tied a ribbon around the top bar of the label holder to help keep the label from sliding out - and to add a bit of texture.

Here's a flip-through of the one album I've got mostly finished. I love the flexibility of the pockets that will allow me to move the cards around as I fill in gaps and the collection grows.
I've still got a ways to go to finish up all the albums, but I'm encouraged to have identified a manageable process to document these special keepsakes for our boys.
Admittedly, it's ambitious to tackle multiple albums at a time. If this tweaks a creative spark for you and it seems like too much, try doing one album with sections for each child's special ornaments. You'll be getting them documented and can set up personalized albums later on.
Since this is our month we're focusing on Creation, I thought I'd share my pocket page experiment with you 'cuz it might spur you on to one of those forgotten creative hobbies, too!
What other bursts of creativity are YOU having this month? Please share in the Comments...you might inspire someone to finish one of their projects!
*Amazon affiliate links may earn a small commission


Your ornament albums are fantastic! I am so impressed that you know the years that you got so many (all??) of them! And putting them into categories is such a good idea. Thanks for the flip-through!!
You did a wonderful job on your ornament album. Very creative!